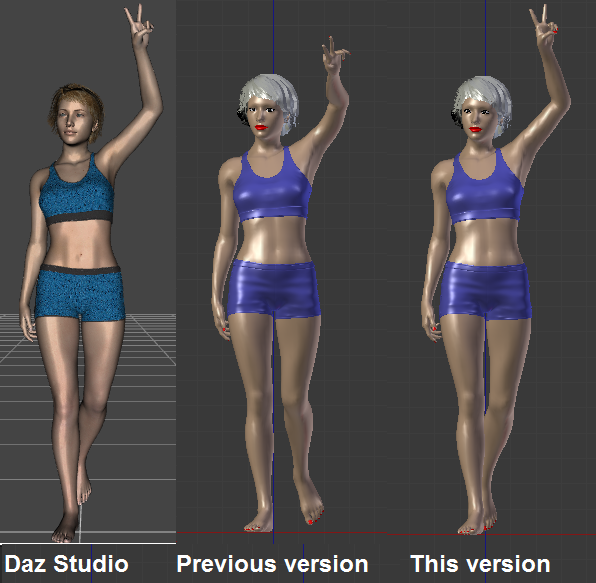
For a long time I thought that I knew how to transfer Daz rotations to Blender, because my algorithm worked flawlessly for characters up to Genesis 3. Alas, when Genesis 8 came along last year, the algorithm did not work correctly. I don't know why it worked for Genesis 1-3, but I suspect that the bone axes coincide with the global coordinate system for those characters, and my old algorithm worked in that case.

Anyway, the algorithm has now been updated, and the picture above shows the difference. Clearly the new version agrees better with Daz Studio than the previous one.
Once we have the correct correspondence between Daz and Blender poses, it becomes possible to translate bone drivers. This is useful for corrective shapekeys, known as Joint Corrective Morphs or JCM's in Daz Studio. A JCM is typically driven by a single Euler angle in Daz Studio, but due to the different bone orientations this corresponds to a mix of all three Euler angles in Blender.

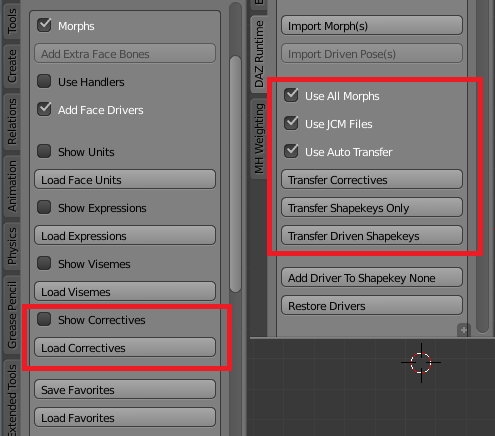
To easily load JCM's for a character, simply press the new Load Correctives button in the Morphs section. If you enable Show Correctives, a list of available correctives open up, and you can select which morphs to load. If the active character is of type Genesis 3 and 8, a long list of shapekeys are loaded, driven by bone rotations. Apparently there are no JCM's for the older character types.

This picture illustrates the difference. The difference is not huge, but corrective shapekeys make deformation better.
Corrective shapekeys make deformation better for the character mesh, but the clothes don't have any. This can be fixed by transferring the shapekeys from the human to her clothes. With the clothes selected and the character mesh active, press the Transfer Correctives button. The deformation clearly improves.

There are several buttons for morph transfer:
- Transfer Correctives: Transfer shapekeys with bone drivers and their drivers.
- Transfer Shapekeys Only: Transfer only shapekeys, don't make drivers.
- Transfer Driven Shapekeys: Transfer shapekeys with property drivers and their drivers.
- Use All Morphs: Transfer all shapekeys from the active mesh. The alternative is to only transfer the active shapekey.
- Use JCM Files: Some vendors have made custom JCM files for their clothes. If such files are found, use them if this option is enabled.
- Use Auto Transfer: If no custom JCM file is found, automatically transfer shapekeys. This is both slower and less good than with custom JCM files.
