Update 2021-10-03
The name of the retargeting tool was changed in version 1.6.0 to Change Armature. It is now located in the Setup > Corrections panel.
Original post
Engetudouiti requested a tool for changing armature modifiers, in order to change clothes of a given character. Using different outfits for the same character is something that I have thought about myself. There are several ways that can be done, but all have their own disadvantages.
One possibility is to create a super-outfit that contains all outfits that the character will ever need, and then put the indidual outfits in subcollections that can be excluded from the scene when not used. This makes the file very heavy, and it takes a long time to load it. It also requires exceptionally good planning. If we later realize that we want to add another outfit to the character, the entire super-file must be reloaded.
Another possibility is to create separate files in DAZ Studio, one for each outfit, starting from the same nude character. This is the method that I have used a lot recently, but it also means work duplication. For each outfit, all morphs must be reloaded. This may not involve much manual work if you use easy import and favorite morphs, but if you then tweak the character in Blender, those tweaks must be repeated for each outfit.
In this post I will describe a third method, which is both flexible and avoids work duplication. The idea is to import the nude character only once, and then import each outfit from a separate file and merge the outfit with the nude character.
DAZ Studio
In DAZ Studio we will create the following files:
- The shape file which only contains the character itself. Not even the eyelashes need to be included in this file.
- The nude file which contains everything that makes up the nude character: body, eyelashes, hair, geografts, and geometry shells.
- One file for each outfit.
Create the character shape. Save the file as aiko-shape.duf. We do not need to export this file to Blender.
Complete the nude character by adding hair, geografts, and geometry shells. Save the file as aiko-nude.duf and export the file to Blender (aiko-nude.dbz).
If we have several shells it may be necessary to change the visibility of some surfaces.
Open the file aiko-shape.duf again and add the first outfit. Save the file as aiko-basic-wear.duf and export to Blender.
Open the file aiko-shape.duf again and add the second outfit. Save the file as aiko-bardot.duf and export to Blender. Your directory should contain the following files:
We are now done in DAZ Studio and switch to Blender.
Import the nude character
We will use Easy Import to import the duf files into Blender. Below the Easy Import DAZ button we have a field where the path to the favorite morphs can be specified. If we press on the folder icon to the right, a file selector opens where we can choose the path to the file with favorites.This button is located in the panel because a file selector can not be lauched from inside another file selector.
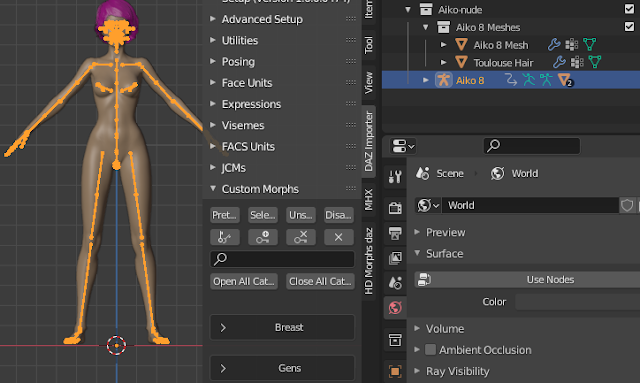
Select the aiko-nude.duf file and make the following settings:
- Merge Rigs: We need to merge the eyelash, hair and geograft rigs with the main rig.
- Use Favorite Morphs: The path to the favorite morphs that we specified before appears here too. However, there is no folder icon since we cannot lauch a file selector from here.
- Transfer Shapekeys: Disabled, because there are no clothes that we need to transfer shapekeys to. If enabled, the tool will try to transfer shapekeys to the hair which normally unnecessary.
- Merge Geografts: Shapekeys whose body part setting is Body or All are transferred to geografts before merging, even though Transfer Shapekeys is off.
- Merge Lashes: Shapekeys whose body part setting is Face or All are transferred to eyelashes before merging, even though Transfer Shapekeys is off.
- Rig Type: Set to DAZ. This is necessary because the Copy Pose tool that we will use later does not work with the MHX or Rigify rigs. Rig conversion can be done manually in the last step.
After some time (a few minutes) the nude character appears in Blender. Save the file as aiko-nude.blend.
Import the first outfit
Open the nude file again and save it as aiko-basic-wear.blend. Open the Easy Import tool and select the aiko-basic-wear.duf file. This time we set the clothes color to blue and only enable the first three options.
Now we have two collections: the nude collection and the basic wear collection that we just imported. The character mesh in the second collection has now served its purpose and can be deleted.
Select the clothes and press Retarget Armature Modifiers
In the popup dialog, select the rig in the nude collection, which Blender has renamed to Aiko 8.002. This changes the targets of all armature modifiers, and also the parent object. Move the collection with the meshes to the Aiko-nude collection, and give it a better name. The remaining objects in the Aiko-basic-wear collection are not needed anymore and can be deleted.
We can pose the character to confirm that the clothes is controlled by the same armature as the body and hair. One final step is needed before we are done: shapekeys must be transferred to the clothes.
With the clothes selected and the body mesh active, press Transfer Shapekeys in the Morphs section.
Since the clothes only cover the body, we set the Body part field to Body. This singles out the JCM morphs which what we want to transfer.
And now the skin is not poking through when the character is posed.
Import the second outfit
The Bardot outfit will pose some new problems.

Open the file aiko-nude.blend again and save it as aiko-bardot.blend. In Easy Import we again leave the three first options enabled and import the file aiko-bardot.duf, and then remove the extra body mesh that we don't need.
The first issue is that the feet and the sandals have different rest poses.
With the body armature selected and the clothes armature active, press Copy Pose. This will pose the body armature so it fits the shoes. Unfortunately, the Copy Pose tool only works with straightforward rigs such as the native Genesis rigs, but it does not work with MHX and Rigify. This is the reason why we set the rig type to DAZ in Easy Import.
The foot is now posed so it fit into the shoes, but the rest pose has not changed. To fix this, press Apply Rest Pose. This is the same button that appears in the Corrections section, but is duplicated here for convenience.
We can not use the Retarget Armature Modifiers tool this time, because the Bardot skirt has extra bones that must be merged with the body rig. Instead we use the Merge Rigs tool in the Corrections section. Note that this time the armatures must be selected in the opposite order: clothes rig selected and body rig active. In the Merge Rigs option, deselect the Create Mesh Collection option.

Now we can pose the dressed character, and use the extra bones to keep the skirt from penetrating the legs.
As mentioned above, we cannot use the Copy Pose tool with the MHX or Rigify rigs, so we must convert the rig manually when everything else is done.


