Assets from Daz Studio are usually awesome, but they often have a high polygon count. This can give problems with performance, especially if you like me use an old Win 7 box from 2009 with only six gigs of ram. Often it is possible to reduce the polygon count with little effect on the final renders.
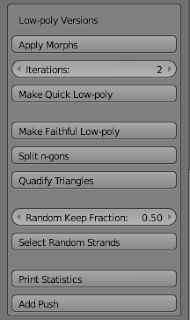
This is where the Low-poly Versions section at the bottom of the Setup panel comes in. In the unstable version it looks like this
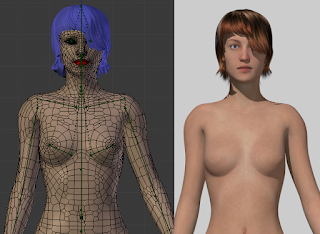
Here is the original character, weighting in
Verts: 21556, Edges: 42599, Faces: 21098
The Make Quick Low-poly button reduces her footprint to
Verts: 7554, Edges: 17800, Faces: 10311
i.e. the number of vertices is almost reduced to a third.
However, there are a number of problems, e.g. the black spots in the should areas. The quick low-poly uses Blender's Decimate modifier, which does not respect UV seams. A decimated face can contain vertices in different UV islands, making the middle of the face stretch over random parts of the texture.
Moreover, since the quick low-poly applies a modifier, the mesh must not have any shapekeys. This is not such a big problem for Genesis 3, where facial expressions are implemented with bones, but for Genesis and Genesis 2 this means no face expressions. The Apply Morphs button is duplicated in this section to get rid of any shapekeys before making a quick low-poly.
To deal with these problems, a second algorithm has been implemented, the faithful low-poly. It is faithful in the sense that UV seams are respected, so there are no faces stretching over unknown parts of the texture.
The footprint of the faithful low-poly is
Verts: 11885, Edges: 21136, Faces: 9306
This is slightly higher than the quick low-poly, but still a nice reduction.
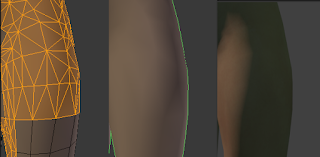
 There are still some problems. In the illustration the shoulders become very jagged when posed. This can be fixed by adding a Subdivision Surface modifier. If the number of view subdivisions is set to zero, the viewport performance should not suffer too much.
 Another problem is that the algorithm produces n-gons, which sometimes leads to bad results. This can be fixed by the Split n-gons button.
 After triangulating n-gons the character weighs
Verts: 11885, Edges: 31111, Faces: 19281
The number of edges and faces has gone up considerably, but I'm not sure that this affects performance, since complicated n-gons have been replaced by simple triangles. The number of vertices stays the same, which is what I think is most important for performance.
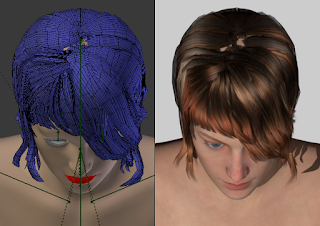
Hair can be particularly problematic for performance. The Aldora hair, which came with some earlier version of Daz Studio, has the impressive footprint
Verts: 123506, Edges: 240687, Faces: 117264
Reducing the weight of a 21,000 verts character makes little sense if we leave her with 123,000 verts worth of hair.
Making a faithful low-poly of the hair reduces the footprint to
Verts: 32574, Edges: 61862, Faces: 29370
without any notable reduction of quality.
 A second iteration of the Faithful Low-poly button reduces the hair further
Verts: 9281, Edges: 16743, Faces: 7544
Compared to the original 123,000 verts, the footprint has gone down with more than a factor of ten!
We now start to see some bald spots on the head, but it should not be too difficult to fix them in edit mode.
If we instead made a quick low-poly in the last step, the footprint became
Verts: 10081, Edges: 20047, Faces: 10048
The baldness problem is perhaps a little less pronounced, but some manual editing is still needed.
Another way to reduce the poly-count for some hair types is provided by the Select Random Strands button. Here is another hair with an impressive footprint:
Verts: 114074, Edges: 167685, Faces: 55553
Not all of the strands are really needed, but it would difficult to select a suitable set manually.
We don't want the skull cap to be selected, so we hide it (select one vertex on the skull, use ctrl-L to select connected vertices, and H to hide).
Select Random Strands to make the selection, and then press X to delete the verts. The Keep Fraction slider was set to the default 50% in this case. There is some tendency to baldness in edit mode, but that is because the skull cap is still hidden. The render looks quite ok but the footprint has been reduced to
Verts: 56116, Edges: 82748, Faces: 27574


