Wednesday, December 18, 2019

UDIM Support

UDIM support has recently been added to Blender 2.82 Alpha. This is very useful for the Daz Importer, because the UV coordinates in Daz Studio are arranged in UDIM tiles, at least for the Genesis 3 and 8 characters.

Since there are several skin materials, editing them consistently is tedious and error prone. The Mini Material Editor addresses this to some extent, but its power is quite limited. With UDIMs we can combine all skin materials into a single one, which we can then edit using the powerful node editor.
Before an UDIM material can be created, the blend file must be saved and the textures saved locally. The reason for this is that UDIM requires that textures follow a certain naming convention. Hence new textures with the appropriate names must be created, and you probably don't want to litter your Daz installation with these extra textures.
Here is the face material for the Genesis 8 Female character. The diffuse texture node has extension = Repeat and source = Single Image.
Once local copies of the textures have been created, the new Make UDIM Materials button becomes active in the Finishing section. Logically it belongs to the Materials section, but if the character has separate anatomy meshes (geografts), they should be merge with the character before making UDIMs.
A pop-up dialog with a list of all materials appears. The selected ones are going to be replaced by a single material with tiled textures. Which of the materials is specified at the bottom of the dialog. It is the first material with textures in the first tile.
After the script has been executed, all selected material have been removed except for the target material Face-3, and all polygons of the removed materials now use Face-3 instead.

The textures nodes have been changed like this. A "T_" has been added in front of the texture name, extension = Clip, and source = Tiled.

In the UV editor, we can now see the tiles of the tiled texture. Notice that the tile labels equal the old material names.
Now let us turn to the other new button, Set UDIM Tile. It is useful when the character is exported with some geograft, e.g. genitals. Here are the UV coordinates of the New Genitalia for Victoria 8 and the corresponding torso texture.
The problem is that the UVs are located in the first tile, but the torso texture will end up in the second tile; its full name is G8FBaseTorsoMapD_1002.
To move the UV coordinates to a specific tile, we use the Set UDIM Tile button. This must be done before Merge Anatomy, because all UV coordinates are moved to the same tile. Select the geograft and press Set UDIM Tile.
Select the tile we want to move the UVs to, and press OK.
The UVs are now moved to the second tile.
Next we Merge Anatomy and Make UDIM Materials. The genital UV coordinates are now correctly located in the second tile.

Sunday, December 15, 2019

Brighter Eyes

A common problem with Genesis 8 characters is that the eyes tend to be too dark in Blender.
The reason for this is that the eye textures are quite dark.
Somehow Daz Studio manages to avoid this problem, but it is not so easy to emulate this in Blender. Therefore the Daz importer now has an option to brighten the eye textures. This option appears at the bottom of the import menu, and is set to a value which is reasonable for Genesis 8.
If Brighten Eyes is set to something else than 1.0, an extra multiply node is generated for the iris and sclera diffuse channels. It multiplies the eye texture with a more than white color, whose HSV value equals the Brighten Eyes factor.

And now the eyes render much better.
The eyes still look a little strange. It looks like the sclera rests like a disc on top of the eye, and is clearly distinguishable from the rest. But if you look carefully the same effect is visible already in the dark eyes on the top.

Monday, December 2, 2019

Moving to Git


Bitbucket has decided to remove Mercurial support from Bitbucket Cloud and its API. Mercurial features and repositories will be officially removed from Bitbucket and its API on June 1, 2020. This affects the DAZ Importer.

The Mercurial repo, including all history, has been renamed to DAZ Importer Archive, and the DAZ Importer has been changed to a brand new git repo. Actually, I think it can be a good thing to clean out ancient stuff from the repo and make it more lightweight.

The old Mercurial repo is here.

The old issue tracker is here.

The new git repo is here.

The new issue tracker is here.

The current version can be downloaded as a zip file from here. Actually, that should be the same as before.


Wednesday, October 30, 2019

Mini Material Editor

In version 1.4 of the Daz Importer, there were a few buttons at the bottom of the Materials section that allowed you to change the bump strength and distance. The original purpose of these buttons was to fix problems with 3Delight materials. Modern versions Daz Studio converts 3Delight materials to Iray before saving, and some information about the bump settings are lost in this process; in particular, AFAIU the bump distance is always 0.5 mm in Iray. The bump editing buttons could fix that problem in Blender.

However, these buttons could be used in another way: to edit the materials in Blender, either because the Daz Importer does not convert materials to Blender perfectly, or because you want to change the look and feel. For a single material, the simplest and most versatile way to do that is of course directly in the shader editor. However, Daz meshes often have many materials, and to apply the same change across multiple materials can be quite tedious and error prone.

To solver this problem, the bump buttons have been expanded into a Mini Material Editor. A few buttons allows you to quickly apply changes across multiple materials for the same mesh. The Material Editor is located at the bottom of the Materials section:

  • Active Channel: The channel affected by the change. The following channels are currently supported:
  • Factor/Value: Multiply the value of the active channel by this value, or set the value to this value. For scalar channels. For vector channels, e.g. Subsurface Radius, all components are multiplied with the same factor.
  • Color Factor/Value: Multiply the value of the active channel by this value, or set the value to this value. For color channels.
  • Absolute Values: Determines whether the channel should be multiplied with the factor or set to the value.
  • Material Type: Only change materials of the given type:
The Skin and Skin-Lips-Nails types depend on the material names, so if you rename the materials, the wrong materials may be affected. In contrast, the Opaque and Refractive types depend on the properties of the node tree.
Here is what happens to the bump node of the Face material if
  • Active Channel = Bump Strength
  • Factor/Value = 0.5
  • Absolute Values = False
  • Material Type = Skin
when we press the Change Channel button. The original bump strength is decreased from 3.0 to 1.5, i.e. multiplied by a factor 0.5.


Friday, October 11, 2019

Resizing textures

Daz textures are often very large and detailed, which leads to high memory consumption during rendering, and often one can reduce their size without affecting the final render quality very much. Some time ago I implemented a stand-alone tool for resizing textures, and wrote about it here

Update:  Installing OpenCV is no longer necessary, because the DAZ Importer now uses a call to Blender's API to resize textures.

However, running a python program from the terminal window is inconvenient, so I never used that tool very often. To make resizing textures more usable, the tool can now be run from within Blender.

Actually, the resize tool can not be executed entirely within Blender, because it uses OpenCV which is not included with Blender python. Instead the add-on makes a system call to python, running the tool as a stand-alone script under the hood. This means that in order to use the resize tool, python 3 and OpenCV must be installed on your system.

For Python 3, I use Anaconda, which can be downloaded from here. Installing OpenCV was a bit tricky and unfortunately I don't remember how I did it, but there are many instructions on the web, e.g. this one. The rest of this post assumes that your system has python 3 and OpenCV installed.


When the scene has been imported into Blender, save the blend file. At the top of the Materials section, Save Local Textures and save the blend file again. This copies the textures to a local folder where you can modify them. You don't want to mess up the original textures that belong to Daz Studio.

No press Resize Textures. A file selector opens in the local textures folder that you just created.


There are two options:
  • Steps: The number of steps that the image size is reduced. Each step reduces the linear size with a factor of two, so the number of pixels is reduced by a factor of four. 
  • Overwrite Files: Whether the original images be overwritten or not. If we choose not to overwrite, new lower-resolution images are created but the original files are kept. The new files are named by adding "-resN" to the file name, where N is the number of steps. Note that the naming convention has changed compared to the stable version 1.4.
Finally, select the images that you want to resize and press Resize Textures. In my experience it is easy to forget to select images, so if nothing happens check that you have select some images.

After Resize Textures has been pressed, we can follow the progress in the terminal window. First the standalone script creates the downscaled textures. Since we choose to resize the textures two steps and the original textures are 4096 x 4096, the new textures have the size 1024 x 1024.

After that the original textures are replaced by the resize ones in all materials of the selected meshes.
To actually resize the textures within Blender requires python 3 and OpenCV to be installed. However, if you have created the resized textures yourself with some other tool, you can replace the original textures with the lower-resolution ones with the Change Resolution button. It does not make a system call so no external dependencies are needed.

Of course the resized textures must exist. If the original file is called foo.jpg, the file name of the textures resized N steps is foo-resN.jpg. If no such file is found, the original texture is kept.
When you press Change Resolution, a popup menu appears which allows you to choose the number of resize steps. Zero steps means the original image.

Here is a comparison of different resolutions.
Original resolution, 4096 x 4096. Memory use 1161M.

Resized 2 steps, 1024 x 1024. Memory use 342M
Resized 4 steps, 256 x 256. Memory use 291M.
Resized 8 steps, 16 x 16. Memory use 288M.
Very little is lost when the original textures are reduced two steps, but the memory consumption during rendering falls by a factor 3.4. Reducing the resolution further does not improve memory usage very much, but the render quality drops dramatically; especially the alpha channel of the hair shows problems.


Monday, August 12, 2019

Stable version 1.4

A few weeks ago, Blender 2.80 was released, and thus it is finally time to release version 1.4 of the Daz Importer. It contains many improvements and bugfixes, but most importantly, it runs under Blender 2.80. It still also runs under Blender 2.79. Compared to version 1.3 there are also many improvements in Cycles materials, but most of these were already present in version 1.3.1.

Stable version 1.4 can be found at: https://www.dropbox.com/s/dvredkkiyyp1rp8/import-daz-v1.4-20190807.zip. It is identical to the development version as of today.

The documentation has also been updated to agree with this version: https://diffeomorphic.blogspot.com/p/daz-importer-version-14.html.

Tuesday, July 9, 2019

Add-ons

This post was updated on July 24, 2019 due to changes in the add-on interface.

Recently user engetudouiti wrote a script for setting roll angles. Although the script appears to be useful, I have not studied it in detail and don't have time to support it.  Instead, I thought it might be a good idea to create a mechanism that lets users add functionality to the Daz importer. In short, an add-on system.

Blender of course already has an add-on system, and you could write Blender add-ons that invoke the import-daz module, but that approach has some drawbacks. In particular, such "horizontal" calling will break if the name of the import-daz module is changed, e.g. to diffeomorphic-import-daz-bb15d1ca5708. A cleaner solution would be that add-ons for the Daz importer could be handled by the importer itself. The new add-on system in the development version does just that. This is work in progress and details will almost certainly change in the near future.

A Daz importer add-on is a python file that you put in the addons directory (under the import-daz directory, which itself is located under Blender's addon directory). It must contain the same information as a Blender add-on: a bl_info dict, and a register and an unregister function. Packages are supported; in that case the file __init__.py, must contain the bl_info dict and the register and unregister functions.

The file __init__.py in the addons folder should not be touched. It is an empty file which is necessary to make the addons directory into a Python package.

Information about the add-ons is found in the new Add-Ons menu. When no add-ons are loaded, it only contains the buttons Refresh and Save Settings.
When we press Refresh a list of add-ons appear below the buttons. All add-ons are loaded into memory, but they are not yet registered.
The interface is very similar to Blender's native add-on interface, cf https://docs.blender.org/manual/en/latest/preferences/addons.html. Each add-on has an arrow button, an enable checkbox, and the name of the add-on. The arrow button displays more information about the add-on, which is extracted from the bl_info dict.

When the checkbox is enabled, the add-on's register function is executed.
The Save Settings button saves a list of enabled add-ons. The next time Blender is started (or when the F8 key is pressed), these add-ons are loaded and enabled.


Saturday, April 27, 2019

Downsizing textures

DAZ characters usually have many large and beautiful textures. This can be a problem if you try to render a scene on an old computer with limited RAM memory, because once the memory is full Blender comes to a halt. However, for many purposes the texture resolution is unnecessarily high. Therefore, I have provided a utility program that downsizes all textures in a given directory, and a button in Blender that replaces the original textures with the downsized ones.

Install OpenCV

The script which resizes images cannot be used from inside Blender, because it uses the OpenCV library which is not included in Blender python. Installing OpenCV is quite complex, but the instructions at https://www.learnopencv.com/ are very useful.

Windows: https://www.learnopencv.com/install-opencv-4-on-windows/
Mac: https://www.learnopencv.com/install-opencv-4-on-macos/
Other operating systems: https://www.learnopencv.com/?s=install.

On Windows you start by installing the following software:
  1. Visual Studio.
  2. CMake.
  3. Anaconda. I installed the Python 3 version but Python 2 will probably work too.
  4. Git for Windows.
The instructions refer to install scripts whose location is not immediately obvious. The Windows versions can be found at https://github.com/spmallick/learnopencv/tree/master/InstallScripts/Windows-4.

Usage

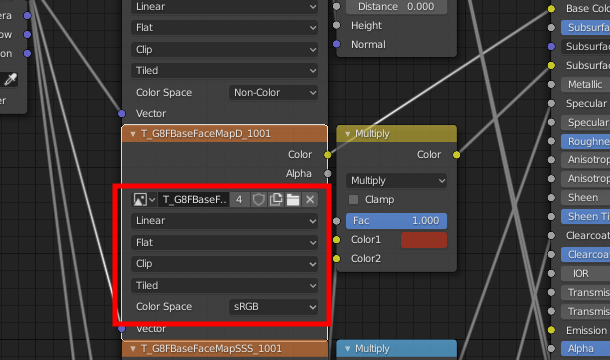
In Blender, import a DAZ scene as usual. Save the blend file and press Save Local Textures.  This creates a subdirectory called textures and copies all used textures there. Note that this button has been moved from the Finishing section to the Materials section in the Setup panel.

The downsizing script is called resize.py and is located in the standalone folder. Once OpenCV has been installed, open the command prompt, go to the standalone folder, and type

activate OpenCV-master-py3
python resize.py <path to texture directory> <resize steps>


This creates new textures whose resolution is 1/2^steps of the original resolution, where steps is an integer between 0 and 4. E.g., if the original image has 4096x4096 pixels and steps = 2, the downsized image has 1024x1024 pixels. The total number of pixels is thus reduced by a factor 16.

In Blender, press Resize Textures, select the number of steps, and press OK. Clearly the resized images must exist in the right directory.

Results

Here are the results on my computer for a scene with a single nude Genesis 8 Female:


                   Step Total size  Render time
Original 0 24.9 Mb 59.24 s
25% 2 3.79 Mb 55.92 s
6.25% 4 342 kb 56.23 s

When going to maximal downsizing, the total disk space occupied by the textures is reduced by more than a factor 70. This is less than the factor 256 that one would naively expect for a bitmap, because the images are stored in compressed formats such as jpg or png. On the other hand, the render time (with Cycles on Blender 2.79b) does not change significantly in this case, because all textures fit into RAM memory. In realistic scenes, which contain multiple characters with hair and clothes, the original textures may fill up RAM memory and Blender starts swapping to disk. In that case the reduction in render time will be dramatic.

Update July 28, 2019:

When the Resize Textures button is pressed, a pop-up menu appears and asks for the number of rescale steps; one step means that the texture is rescaled by 50% in each direction, two steps that the scale factor is 25%, etc.

The name of the rescaled texture is the original filename followed by the scale factor multiplied by 100. So if the original filename is foo.png, the rescaled textures are named as follows:
StepsScale factorFile name
150%foo-050.png
225%foo-025.png
312.5%foo-012.png
46.25%foo-006.png

This button only replaces the textures in the Blender materials; the rescaled textures must already exist in the same directory. If you have access to some other program that resizes image files, you can of course use that instead of the standalone script bundled with the DAZ Importer, as long as you follow the naming convention above.

If you know that you will never need the original, high-resolution image files, you can alternatively overwrite the original filenames with the scaled files and reload the blend file.

Sunday, March 31, 2019

AutoFace - How It Works

The core of AutoFace is the 3DMM face identity shape network described in

A. Tran, T. Hassner, I. Masi, G. Medioni, "Regressing Robust and Discriminative 3D Morphable Models with a very Deep Neural Network", in CVPR, 2017. The preprint version is available as arXiv:1612.04904 [cs.CV].

Code for this has generously been made available at Github, https://github.com/fengju514/Expression-Net.

The Expression-Net script analyzes a single input image and outputs a 3D shape in the form of weights for a set of 99 morphs labelled 00 to 98. The location of a mesh vertex is


The Expression-Net script also describes the 99 morphs, but only for a modified Basel Face Model (BFM), which appears to be popular among AI researchers. The BFM is a high-density face mesh, and as such rather unusable for artists, who prefer a medium-density full body mesh, which is rigged and textured. A key contribution of AutoFace is to translate the morphs from the modified BFM into shapekeys for two useful meshes, the Genesis 8 Male and Female characters used in DAZ Studio.

The pictures below show the first few morphs, for the modified BFM, Genesis 8 Male, and Genesis 8 Female. First the original meshes with no shapekeys applied.

Basic shapes - unmorphed meshes


Shapekey 00
Shapekey 01
Shapekey 02
Shapekey 03
Shapekey 04
Shapekey 05
Shapekey 06
A number of comments are in order.
  • The shapekeys in AutoFace are ten times stronger than the original ones, and hence the coefficients must be reduced by the same factor of ten. The reason is that higher shapekeys are quite subtle and difficult to detect.
  • The Genesis shapekeys taper off near the boundary of the BFM, in order to avoid a sharp transition to the rest of the head mesh. In particular a fattened jawline, such as the one in shapekey 00, is not transferred correctly. This problem may be affecting the example with president Trump.
  • They eyes, including the skin behind the eyes, are not morphed. Instead the eye vertices are scaled and translated based on the movement of the corners of the eyes. This ensures that the eyes remain round, which is desirable when posing.
  • Similarly, the inside of the mouth is scaled based on the movement of the corners of the mouth, in order to ensure that the jaws and teeth remain inside the face.
  • The shapekeys shown in this post are more or less symmetric. Higher shapekeys are less pronounced, and some of them are asymmetric.
As always, something is lost in translation, so it would be better if the deep network were trained directly for the Genesis 8 meshes. Or for subdivided versions of them. They high-frequency data could then be converted into a normal map. Alas, I neither have the competence, computer resources nor the training data to do this.