- Shift Animation: Shift the keys for the selected bones at all keyframes.If two markers are selected, only the keyframes between the markers are deleted.
- Keep Feet Above Floor: If a mesh object (typically a plane) is selected, shift the keyframes to keep the affected feet above the plane. The plane does not necessarily lie in the XY plane; if the plane is tilted, the feet are kept on the plane’s upper side. If no plane is selected, the feet are kept above the XY plane (z = 0). The IK feet are affected if the rig has and uses IK legs, otherwise the FK feet are kept above the floor. If two markers are selected, only the keyframes inbetween are shifted.
- Fixate Bone Locations: Replace all location keys by their average. Only selected bones and keyframes between selected markers are affected.
- Simplify F-Curves: Simplify F-curves by removing unnecessary keyframes.
- Time-Scale F-Curves: Scale F-curves in time.
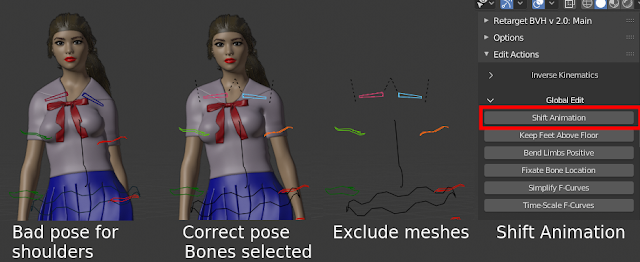
Shift Animation
This button shifts the keys for the selected bones at all frames. This can be used e.g. to correct for systematic bad retargeting.
The BVH files from ACCAD typically yield slooping shoulders throughout the animation. To quickly compensate for this, correct the pose for the shoulder and upper-arm bones at one frame. Exclude the meshes from the scene to improve performance, and press Shift Animation. The shoulder poses is now fixed at all frames.
Another common use is to move and rotate the hip bone to another location. E.g., if we want to stitch two actions together, the hip bone at the beginning of the second action should be at the same location as it is at the end of the first action.
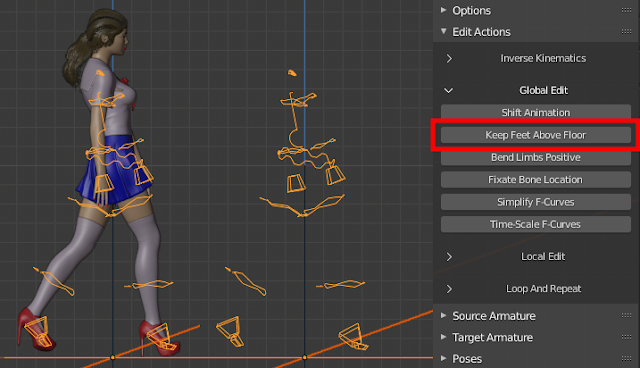
Keep Feet Above Floor
With the plane selected and the armature active, press Keep Feet Above Floor. Exclude meshes from the scene to improve performance.
At all frames where the foot and toe bones were below the plane, the hip is moved to keep the lowest foot or toe bone on the plane. If no plane is selected, the feet are kept above the XY-plane (Z = 0) instead.
The algorithm keeps the foot and toe bones above the plane, but the meshes may still have vertices that are below it. The MHX rig has three special marker bones on each foot, marking the location of the toe, ball and heel. They are located on the MHX Tweak layer.
Move the marker bones in edit mode to the bottom of the toe, ball and heel meshes. Now Keep Feet Above Floor keeps the lowest marker on the floor instead, making sure that the mesh never penetrates the plane.
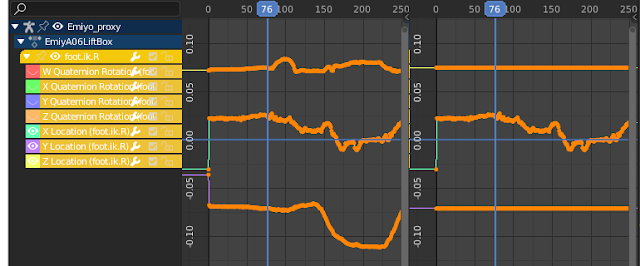
Fixate Bone Locations
Replace all location keys by their average. Only selected bones and keyframes between selected markers are affected.- X, Y, Z: Components affected.

Here are the location F-curves for an IK foot, before and after the bone location has been fixated.
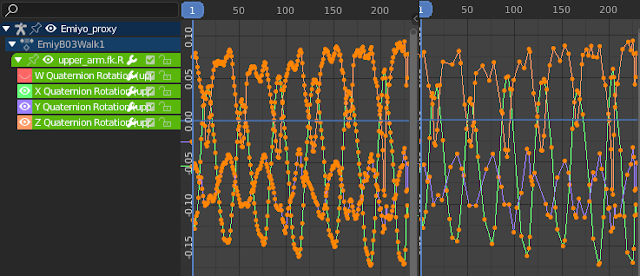
Simplify F-Curves
- Only Visible F-Curves: Simplification only affects visible f-curves.
- Only Selected Bones: Simplfication only affects f-curves for selected bones.
- Only Between Markers: Simplifcation only affects frames between two selected markers on the time-line.
- Max Loc Error: Maximal error for location f-curves.
- Max Rot Error: Maximal error for rotation f-curves, in degrees (for Euler angles). If the rotation is described by quaternions, the error is divided by 180.
This shows the keys on a timeline, before and after simplification.

And here are the corresponding keys in the graph editor.
Time-Scale F-Curves
Time-Scale Factor: Scale the animation in time with the Time-Scale Factor, i.e. scale all f-curves in the x direction.Time-scaling the animation has a major advantage compared to simply scaling the f-curves in the graph editor: additional keyframes are added when needed. This was elaborated upon in the documentation of the corresponding import option.


