

- Set UDIM Tile: Move all UV coordinates of the active mesh to a specified UV tile.
- Merge Geografts: Merge grafted items, typically pieces of anatomy, with the active mesh.
- Make UDIM Materials: Combine materials of the selected mesh into a single UDIM material.
- Merge UV Layers: Merge active UV layer with the
- Make All Bones Posable: Add an extra layer to driven bones, thus making them freely posable.
- Optimize Pose For IK: Put the character in a pose which is a suitable rest pose for IK rigs (knees and elbows slightly bent in the main bending direction).
- Apply Rest Pose: Apply the current pose as the rest pose.
- Connect IK Chains: Connect bones to the parents and unlock the last bone in the chain. To make it possible to use Auto IK.
UDIM Support
Blender now supports UDIMs, which is very useful for the Daz Importer, because the UV coordinates in Daz Studio are arranged in UDIM tiles, at least for the Genesis 3 and 8 characters. More information about UDIMs can be found in the blogpost about UDIM support. Here is the UV layout for Genesis 8 Female characters, like Aiko, and the names of the corresponding UV tiles.

Geografts
A geograft is a high-density mesh which can replace a low-density region of another mesh. This is typically used to add pieces of anatomy to characters. It is most commonly used for genitalia, but can be used for other types of anatomy as well, such as horns or tails.

Also note that the shells are absent. A geometry shell is a mesh with zero vertices which modifies the appearance in Daz Studio, but in Blender an empty mesh is never visible in renders. Instead, the shell becomes a node group in corresponding material.


Set UDIM Tile
Before we can merge the geografts with the body mesh we must ensure that the geograft UV coordinates are located on the right UV tile. We see that the nipples UVs are correctly located on tile 1002, the same as the torso, but the genitals UVs are located on tile 1001.


Merge Geografts
The idea is to remove the body vertices hidden by the piece of anatomy, and to merge common vertices at the boundary and create a single seamless mesh from the two original meshes. Note that merging anatomy changes vertex numbers. Hence will not be possible to import morphs afterwards, neither to the geograft nor to the body mesh. It is a good idea to save the blend file before merging geografts.It is possible to merge multiple geografts, but only if all of them are merged at once. Select all geografts to merge, make the body the active mesh. Again, this is because merging relies on vertex numbers. If the body mesh has been changed in some way, either by merging other geografts or by some other kind of editing, vertex numbers have changed and the body vertices can no longer be identified.


Make UDIM Materials
Once all geografts have been merged with the mesh, we can now convert its materials to UDIM.


Merge UV Layers
In Genesis 8, the eyelashes are also implemented as a separate mesh. We can not use Merge Anatomy on these, because the eyelashes are not grafted items, but it is easy to join them to the main body using Blender's standard tools. With the eyelashes selected and the body mesh active, join the meshes without deleting any vertices (ctrl-J shortcut with Blender 2.79 keymap).


Make All Bones Posable
This button works almost identically as Add Extra Face Bones in the Corrections section, but it adds freely posable bones to bones already driven by other bones. When a Genesis 3 or 8 character is imported, the pectoral and eyelid bones are driven, by the collar and eye bones, respectively. These driven bones can be found on layer 2.


After invoking this tool, there are Drv bones for the fingers on layer 32, and the original finger bones can be rotated, at least as far as the limit rotation constraints allow.
Optimize Pose For IK
The MHX and Rigify rigs are advanced rigs which allow for IK (inverse kinematics). However, IK works best when the joints (elbows and knees) are slightly bent in the preferred bending direction. For Daz rigs this is usually not a problem for the elbows, but sometimes the legs are almost perfectly straight and the knees are hardly bent at all. In that case IK may not work as expected. To avoid this problem, press Optimize Pose For IK.


This picture shows how optimizing the rest pose affect Aiko. The thighs are rotated forward and the shins back, so the knee is bent in the preferred direction.
Apply Rest Pose
The optimized IK pose is just a pose; the rest pose is unchanged. To turn the current pose into a rest pose, press Apply Rest Pose. This differs from Blender's standard tool because the meshes are also changed to fit the new rest pose. Beware that when the rest pose is changed, poses are no longer imported correctly to the character.
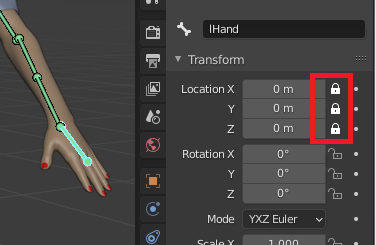
Connect IK Chains
Blender's Auto IK tool allows us to pose a chain of bones by moving the last bone in the chain. This is reminiscent of inverse kinematics (IK), but involves the bones in the FK chain.

Auto IK is enabled in the Pose Options here. However, Auto IK does not work out of the box with Genesis characters, because 1) all bones in the chain must be connected and 2) it must be possible to move the hand, and those conditions are not met by the Genesis rigs.


- Chain Type: Which chains should be connected
- Arms Only:
- Legs Only:
- Arms And Legs: The default.
- Selected: Use this if you want to connect non-standard chains, such as a dog's tail.
- Location: Where are the bones connected.
- Child Head: This preserves the child bone's pivot point.
- Parent Tail: This preserves the orientation of the parent bone.
- Center: Half-way inbetween.
- Unlock Last Bone: Remove location locks for the last bone in the chain.
