In the file selector, navigate to the directory where you exported the base characters from DAZ Studio, and select either Genesis 8 Female.duf or Genesis 8 Male.duf, depending on the target character's gender.
Two of the import settings to the left are important:
- Mesh Fitting should changed from the default JSON file to either Unmorphed Shared or Unmorphed Unique.
- Unit Scale must be = 0.01. The base unit in DAZ Studio is centimeters, whereas Autoface needs the base unit to be meters; the factor 0.01 translates between the two.
- Vertex numbers must be preserved.
- Distances must be scaled by a factor 0.01 compared to DAZ Studio.
The DAZ importer imports every mesh with its own armature. A nude Genesis 8 character consists of two meshes, the body and the eyelids. Dressed characters have additional meshes for the clothes.
To join all armatures, select all armatures with the body armature active, and press Merge Rigs in the Corrections section. A single armature is now the parent of all meshes. Since this armature will not be used for the next few steps, we move it to a hidden layer.
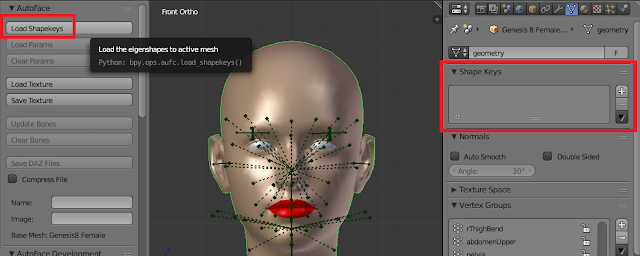
Now switch to the AutoFace tab and select the body mesh. Note that it has no shapekeys. Press Load Shapekeys.
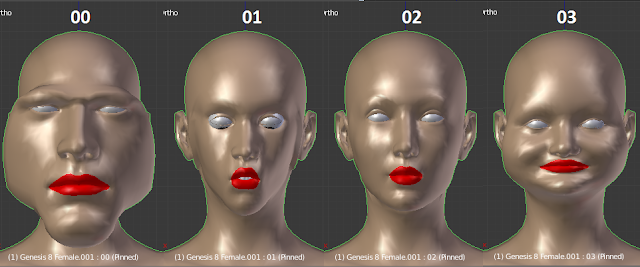
99 different shapekeys, or eigenfaces, are loaded and labelled 00 to 98. Every character is a linear combination of these eigenfaces. The first few eigenfaces are shown in the picture below.

In fact, the eigenfaces used by Autoface are ten times stronger than the original ones, so setting the value of a shapekey to one is really means ten. The reason is that the higher eigenfaces are quite subtle and it is difficult to detect them. This just means that the amplitudes for each shapekey is reduced by a factor ten. Hence the shapekey values typically run between -0.1 and 0.1 rather than -1 and 1.
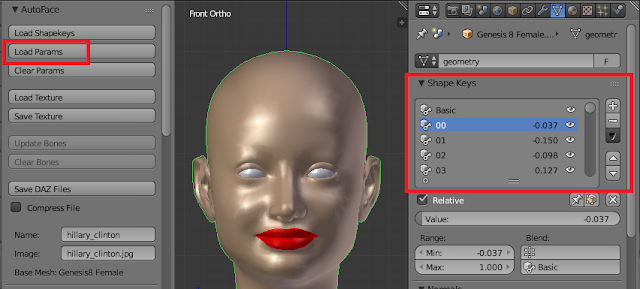
To load the parameters that the describe a certain face, press the Load Params button. The file browser opens up in the Autoface/parameters directory, where you should find the parameter files downloaded from Google Drive.

The shape key values are now set.
The next step is to load the texture. This is not strictly necessary if your only goal is to save a file for DAZ Studio. Press Load Texture and a file browser opens in the directory where textures are stored.
Select the appropriate texture and press Load Texture.
The Save Texture button opens a file browser in the same directory and allows you to save the texture. This is useful if you tweak the texture in Blender, using the Texture Paint tool, which is highly recommended (even if I don't do it myself, being more of a programmer than an artist).
We can now render the character.
The shape keys have changed the mesh, but the parent armature is unchanged. In particular, the location of the bones in the face rigs have not changed, which clearly is incorrect. To correct for this, enable the layer with the armature. With the mesh selected and the armature active, press Update Bones. The facial bones move to adjust to the morph.
Notice how the eye and eyelid bones have moved to the center of the eye. The Clear Bones button resets the bone locations to their original values.
The final step is to export the character for use in DAZ Studio. Select the mesh again and press Save DAZ Files. The character can now be loaded into DAZ Studio, which is the subject of the next chapter.
Donald Trump can be loaded into Blender in exactly the same manner, except that we need to start with Genesis 8 Male instead. Here is the face mesh and a render.
Frankly, I am somewhat disappointed with this last result, which is why I used Hillary Clinton as an example in this tutorial. Likeness is unfortunately not very striking.


