- Eliminate Empties: Remove superfluous empties in the imported scene,
- Merge Rigs: Merge all selected armatures with the active one.
- Merge Toes: Merge the individual toe bones with the main toe bone. Useful if you don't need to control the individual toes separately, e.g. if the character wears shoes.
- Copy Pose: Copy the pose from the active armature to selected armatures.
- Apply Rest Pose: Apply the current pose as rest pose for the selected armatures and their child meshes.
- Change Armature: Change the armature modifier of selected meshes.
Merge Rigs
When the character is first imported, each piece of clothing is equipped with its own armature, which may be parented to the main character rig.Normally
we want to join all armatures which control both the character and all
clothes. The Merge Rigs button merges all selected rigs to the active
one. If the imported scene consists of a single character, the main character rig is the active one and the clothes rigs are selected, so we can just press the button.
- Clothes Layer: Bone layer for extra bones added by clothes.
- Separate Characters: Don't merge unparented rigs. Use this in scenes with multiple characters, to merge clothes rigs to the right humans.
- Merge Non-conforming Rigs: A non-conforming rig is an armature that is bone parented to the main armature. If this option is enabled, common bones are nevertheless merged.
- Create Duplicate Bones: Create separate bones if several bones with the same names are found.
- Create Mesh Collection: Put the meshes in a separate collection. This is useful for excluding all meshes from the scene to increase performance when loading poses.
When
the character is imported into Blender, the bones are put on bone layer
1. The clothes may add new bones to the armature, and we now get to
choose on which layer to put them.
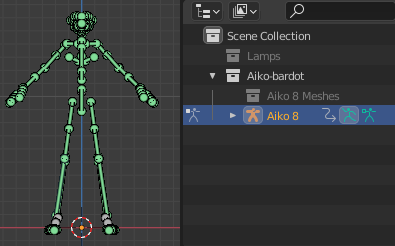
We see in the outliner that the rigs that were parented to Aiko have
disappeared, and that the meshes are now directly children of the Aiko
rig. On the clothes layer 3 there are two new bones which come from the
skirt armature.
Eliminate Empties
Some assets create empties that are not really useful in Blender but mostly in the way. A typical example is this jacket with buttons, where each button consists of a mesh that is parented to an empty that is parented to a bone.The Eliminate Empties tool removes this extra layer of empties. Select the parent armature and press Eliminate Empties. The empties are gone and the meshes are parented directly under the bone. Eliminate Empties can be done before or after Merge Rigs. Or not at all if you wish to keep the empties.
Other vendors implement jacket buttons as empties that are instanced to a mesh. Instanced empties are important because they show up in renders, and therefore the Eliminate Empties button does not remove them.
Merge Toes
When the rigs have been merged, we often want to merge the toes. Since Aiko is wearing shoes, there is no reason why we should want to pose the toes individually, so we press Merge Toes to let the big toe bone control all toes.Changing outfits
The following three buttons are useful in the situation that we want to add multiple outfits to the same character, as described in this blog post, but they can also be used in other situations.
Assume that we have imported two versions of Aiko, wearing the Basic wear and Bardot outfits. We want to combine both outfits so a single characters is using them.We will not need the body, eyelashes and hair from the Bardot collection, so let us delete those meshes first.
Copy Pose
This tool copies the current pose from the active armature to the selected ones. The foot pose of the Bardot rig differs from the nude rig, to account for the sandal's heel. With the Bardot rig active and the nude rig selected, press Copy Pose. The nude foot is posed to fit into the sandal.
Apply Rest Pose
Note that the We can then use the Apply
Rest Pose button. It differs from the standard Blender tool in that it
also changes the meshes that are parented to the affected armature.
Select the posed Basic wear rig and press Apply Rest Pose. The new foot pose becomes the rest pose.Sometimes
it is necessary to apply the current pose as rest pose before merging
for some of the armatures, but not for all.
Import
Aiko with Bardot outfit with Mesh Fitting set to one of the Unmorphed options. Then the
foot and the sandal have different rest poses. The foot is posed to fit
into the sandal, but since the sandal inherits the pose from the foot,
the pose is applied twice to it. We
fix this by making the foot pose as the character's rest pose. The
sandal rig must not be selected, because we don't want to change its
rest pose. Nothing moves in the viewport after we use the Apply Rest
Pose Tool, but the tip-toe pose is now Aiko's rest pose.When we now Merge Rigs, the sandal jumps into position.Change Armature
This tool changes the armature modifier of the selected meshes. It also changes bone parents and add extra bones to the armature. It is quite similar to the Merge Rigs tool which can be an alternative.We want to use the Basic wear armature, i.e. Aiko 8.002, for the Bardot outfit as well. Select the three Bardot meshes and press Change Armature.Specify the armature in the option box. The Bardot outfit now uses the same armature as the other meshes, which we can check by loading a pose. Note that the special skirt bones have been added to the new armature.
If we arrange the meshes in separate collections we can change outfits by excluding the Basic Wear and Bardot collections, respectively.


