A decal is projected from an empty (the projector) onto a mesh. In
an earlier post we discussed a tool for adding decals to DAZ meshes. However, there were some shortcomings which made the decal tool rather unusable:
- The decal were also projected on surfaces that are facing away from the empty.
- Decals could not cross material boundaries, forcing us to some very convoluted constructions.
- Only images with an alpha channel were supported, but not jpeg images with masks.
- There was no indication in which direction the decal was projected.
Recently Alessandro Padovani and Xin made me revisit the decal tool, with some nice improvements.
Select the mesh and press Advanced Setup > Materials > Make Decal. A file selector opens.
First we can select the materials that the decal will be added too. We can select one or several materials. The buttons at the top work in the same way as in the
material editor or the
UDIM tool. The remaining options are:
- Channel: The channel that the decal should be added to, e.g.
- Diffuse Color
- Principled Base Color
- Bump
- Reuse Empty: If selected, an existing empty in the scene is used to project the decal, otherwise a new empty is created. If the decal affects multiple channels, enable this after the first channel has been loaded.
- Empty: A list of available empties. If None is selected, a new empty is created.
- Use Mask: Use a separate mask image for transparency. If disabled the image's alpha channel is used instead.
- Decal Mask: Path to the mask file. A file selector for the mask is below the Make Decal button.
- Blend Type: How the decal is blended with the base texture (Mix, Multiply, etc.). The default is Mix.
An empty with the shape of a flattened cube is created at the origin. The extent of the cube is approximately the region where the decal lives. Move, scale and rotate the empty until the decal looks as desired.
Next we want to add a second decal, which is a jpeg file. Since jpeg images don't have an alpha channel, we need to add a separate mask image. Before pressing Make Decal, set the Decal Mask below it, using the folder icon. In the file selector that opens, select the heart-mask.jpg file.
Now press Make Decal again and enable Use Mask. A new field with the previously selected mask file appears. Now select the heart.jpg file.
There are now two nodes that modify the diffuse texture. The node groups have the same label, but they are really different node groups because different empties control the location of the decal.
Position the second decal in the same way as the first.
To make a decal cross a material boundary, it must be assigned to both materials. The Skin button selects the skin materials, i.e. the torso, face, arms and legs materials in this case. We select the jpeg version of the heart, but if we set the blend type to Multiply the white background will not show up.
Position the decal on the shoulder where the torso and arm materials meet. Note how the problems we encountered in the
previous post do not arise anymore.
Finally we import a star decal. Only the arms material is selected, and we enable Reuse Empty. In the list of available empties, select the one that we created last.
The star decal immediately appears on the shoulder. Note that the tip of the star is cut off, since it was only assigned to the arms material. This is a rather artificial example. Normally we reuse an empty if we load related decals to different channels, e.g. diffuse and bump.
The shape of the cube gives a visual cue about the extent of the decal. If the cube is scaled in the local Z direction, i.e. it is made deeper, the decal may show up on the other side of the mesh as well, as in the picture below.
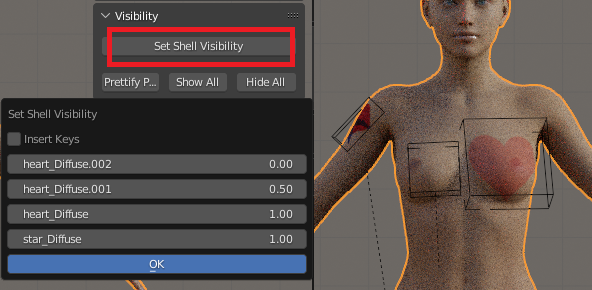
We can control the visibility of the decals with the Set Shell Visibility tool which appears in the Visibility panel when the mesh is the active object. In the popup dialog there is an entry for each decal. The same tool also controls the visibility of the shell nodes. The Insert Keys option allows us to animate the decal visibility.

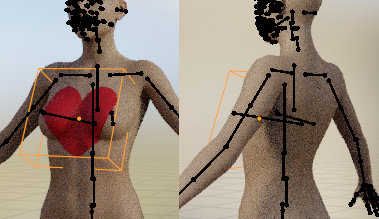
Finally we vertex parent the decal empties to the mesh, so they move with the mesh when it is posed.
And here the mesh is posed with the decals in place.


